Your default camera saves GPS data, but that data is hidden. It never appears on the photo itself. To show address on photo automatically, you need a GPS camera app that burns the address directly onto the image as visible text. This guide covers how it works, how to set it up on Android and iPhone, and what to do when something goes wrong.
TL;DR
- Your default camera does NOT display the address visibly. It hides GPS data in invisible EXIF metadata
- A GPS camera app burns the address, coordinates, and timestamp directly onto the image
- Works on Android (Fused Location Provider, typically within 50 m) and iPhone (Core Location, ~5 m outdoors)
- Setup takes under 5 minutes: install app, grant precise location, capture, done
Quick Answer – How to Show Address on Photo Automatically
Install a GPS camera app and grant Precise Location permission. Use that app to take photos instead of your default camera. The app reads your GPS coordinates, converts them into a street address, and stamps that address onto the image permanently.
Here is the complete process in five steps:
- Download a GPS camera app (Android: Google Play / iPhone: App Store)
- Open the app and grant Precise Location permission when prompted
- Enable automatic date and time in your device Settings
- Frame your subject and tap the shutter
- Check that the address, coordinates, and timestamp appear on the saved photo
That is the core process. The sections below explain why your default camera falls short, how GPS stamping works, and a full walkthrough for both Android and iPhone.
Why Your Default Camera Does Not Show Address on Photos
Every smartphone camera records GPS coordinates when you take a photo. That data is saved in hidden EXIF metadata, which is invisible when you look at the image. Platforms like WhatsApp and Instagram strip this metadata before sending your photo. The location disappears completely.
What EXIF Metadata Is (and Why It Fails for Documentation)
EXIF stands for Exchangeable Image File Format. It is a hidden data layer built into every photo file. Your camera saves GPS coordinates, shutter speed, and device model into this layer automatically. None of that information appears on the image itself.
Reading EXIF data requires special software. Most people who receive your photos do not have it. WhatsApp, Instagram, Facebook, and most messaging apps delete EXIF data when you upload or send a photo. Once it is gone, it cannot be recovered.
[UNIQUE INSIGHT]: This stripping is intentional. Social platforms remove EXIF data to protect user privacy. That same privacy feature creates a real problem for anyone who needs to prove where a photo was taken.
What a Visible Address Stamp Does Differently
A visible address stamp is not metadata. It is written directly into the pixels of the image. The GPS camera app places the address, coordinates, and timestamp as a text layer that gets permanently baked into the photo at the moment of capture.
No app or platform can remove it because the stamp is part of the pixels themselves. Anyone can read the address on any device without special software. That reliability is what makes visible stamps useful for insurance claims, construction reports, and delivery records.
How GPS Address Stamping Works (The Technical Process)
A GPS camera app pulls your location from your device’s hardware. On Android, it uses the Fused Location Provider, which combines GPS satellite signals, nearby Wi-Fi networks, and cell tower data. On iPhone, it uses Apple’s Core Location framework. The app sends those raw coordinates to a reverse geocoding service that converts them into a readable street address and overlays that text onto your photo (Android Developer Docs, 2024).
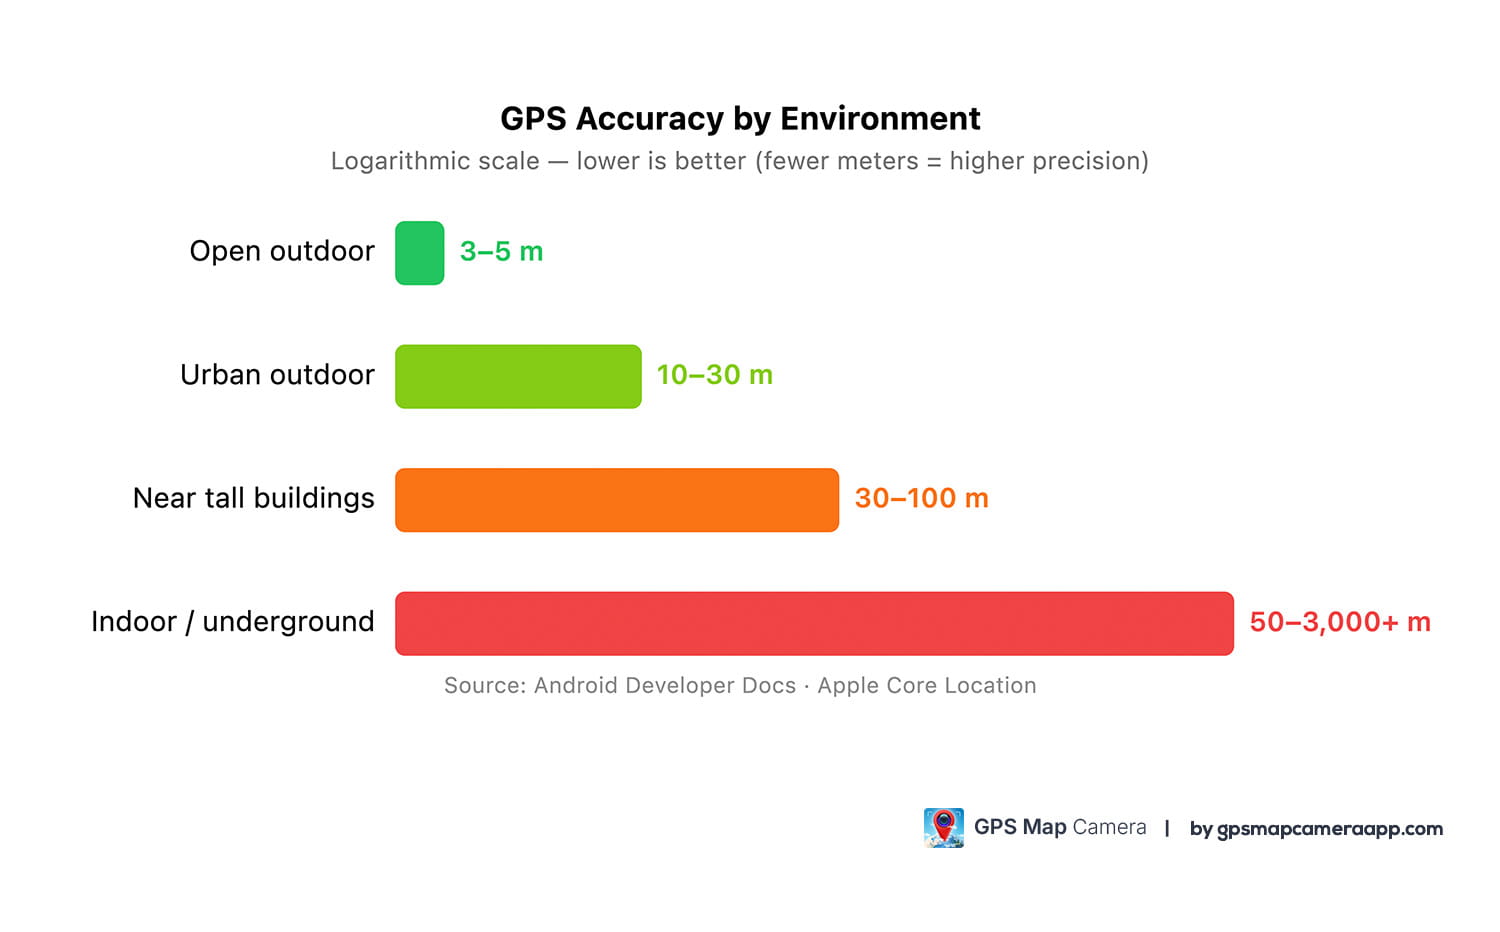
GPS Accuracy by Environment
| Environment | Typical Accuracy |
|---|---|
| Open outdoor (clear sky) | 3–5 meters |
| Urban outdoor | 10–30 meters |
| Near tall buildings | 30–100 meters |
| Indoor / underground | 50–3,000+ meters |
GPS accuracy by environment, per Android Developer Docs and Apple Core Location documentation.
Android – Fused Location Provider
Android uses the Fused Location Provider API to calculate your position. It combines GPS satellite signals, nearby Wi-Fi networks, and cell tower data to find the best available location (Android Developer Docs, 2024).
The app needs the ACCESS_FINE_LOCATION permission to use this system. Typical accuracy is within 50 meters (Android Developer Docs, 2024). In open outdoor conditions it can reach just a few meters. Granting only ACCESS_COARSE_LOCATION limits the app to a 3-square-kilometer area, which is far too broad to stamp a specific address.
iPhone – Core Location Framework
Apple’s Core Location framework handles all location requests on iPhone. When the GPS camera app asks for your location, it requests the highest accuracy level available and targets about 5 meters outdoors (Apple Developer Documentation, 2024).
The permission prompt that appears when you first open the app is an iOS requirement. Choosing “While Using the App” with Precise Location turned on gives the app full access to your device’s GPS hardware.
Why Outdoor Conditions Give Better Accuracy
GPS signals travel in a straight line from satellites to your device. Buildings and concrete block and bounce those signals. Engineers call this effect multipath error, and it makes it hard for your device to calculate a clean position.
A reliable GPS fix requires line-of-sight to at least four satellites at the same time. Step outside and move away from tall structures before you capture a photo. Waiting 10–15 seconds gives the device time to lock onto enough satellites for an accurate address.
Android – How to Show Address on Photo Automatically (Step by Step)
Showing address on photos automatically on Android requires a GPS camera app and the Precise Location permission. Approximate Location is not enough. Android’s Approximate Location only covers a 3-square-kilometer area and cannot resolve a specific street address (Android Developer Docs, 2024).
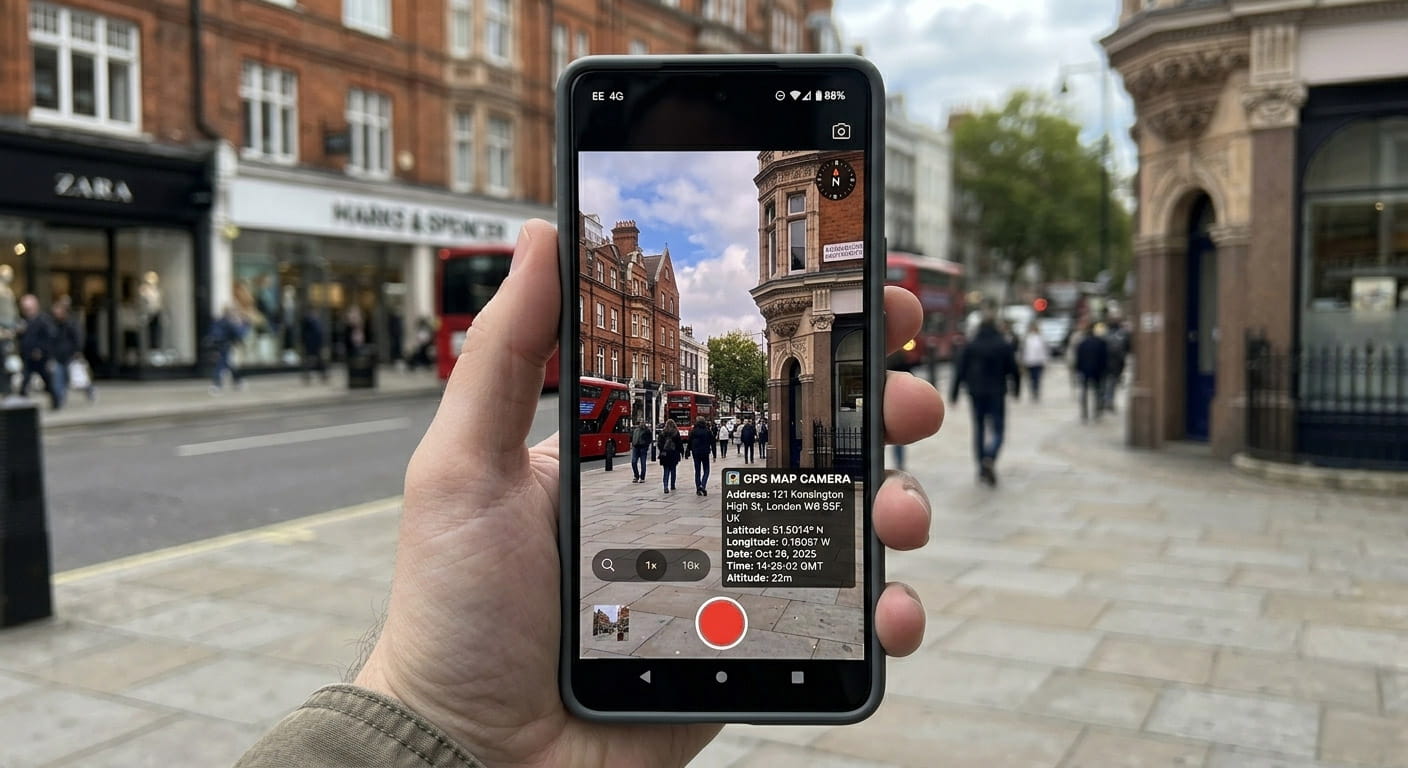
For a more detailed walkthrough, see the complete Android GPS photo stamping guide.
Step 1 – Install the GPS Camera App
Open Google Play on your Android device and search for “GPS Map Camera.” Tap Install and wait for the download to finish. Once it is installed, tap Open to launch the app. A permission prompt appears on first launch. Do not skip it. This is where location accuracy is set.
Step 2 – Grant Precise Location Permission
A permission dialog appears when the app opens for the first time. Tap “Allow.” Then select “While Using the App” and confirm that Precise Location is enabled rather than Approximate.
If you previously chose the wrong option, open Settings and go to Apps, then GPS Map Camera, then Permissions, then Location. Switch it to Precise. This one change fixes most cases where addresses do not appear.
Step 3 – Enable Automatic Date and Time
Your GPS stamp includes a timestamp along with the address. A wrong device clock means a wrong timestamp. That error can undermine the photo as a document. Go to Settings, then General Management, then Date and Time, and turn on “Automatic date and time.”
Step 4 – Capture Your First Location-Stamped Photo
Open the GPS Map Camera app. A location overlay appears in one corner of the viewfinder. If it shows “Locating…”, step outside and wait 5–10 seconds for the GPS to lock. Once the full address appears in the overlay, frame your shot and tap the shutter. The address is now a permanent part of the image.
Step 5 – Verify the Saved Image
Open your Gallery app and find the most recent photo. Tap it to view at full size. Check that the address, GPS coordinates, timestamp, and date are all visible on the photo. If anything is missing, go back to Settings and confirm your location permission is set to Precise.
iPhone – How to Show Address on Photo Automatically (Step by Step)
The iPhone process works the same way as Android but runs on iOS’s Core Location framework. When prompted, select “While Using the App” with Precise Location turned on. Do not choose “Once” or “Never.” Apple’s Core Location reaches about 5-meter accuracy outdoors, which is more than enough for property and field documentation (Apple Developer Documentation, 2024).
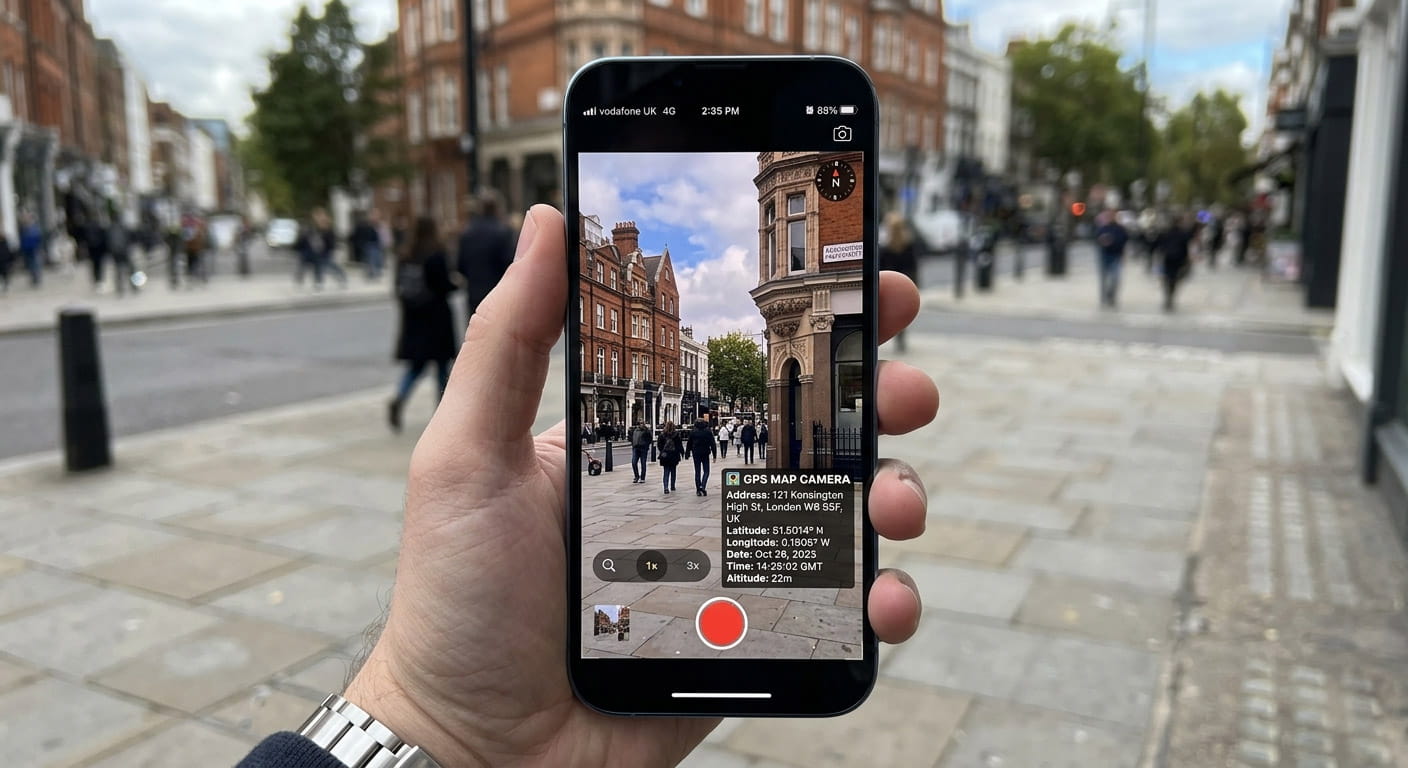
For a more detailed walkthrough, see the complete iPhone GPS photo stamping guide.
Step 1 – Install the GPS Camera App from the App Store
Open the App Store on your iPhone and search for “GPS Map Camera.” Tap the download button and authenticate with Face ID or your Apple ID password if prompted. Once the app installs, tap its icon to open it. The permission screen appears right away.
Step 2 – Grant Location Access in iOS
Tap “Allow While Using App” on the permission dialog. Then go to Settings, Privacy and Security, Location Services, and GPS Map Camera. Make sure the setting shows “While Using” and that the Precise Location toggle is ON. When Precise Location is off, the app uses approximate positioning, which is not accurate enough for address-level stamps.
Step 3 – Check Date and Time Settings
Go to Settings, then General, then Date and Time. Turn on “Set Automatically.” iOS syncs to your carrier’s network time. That keeps the timestamp on every photo accurate to the actual moment of capture.
Step 4 – Take a GPS-Stamped Photo
Open the GPS Map Camera app and wait for the address overlay to appear in the viewfinder. This usually takes 5–10 seconds outdoors with a clear view of the sky. Once the address populates, frame your shot and tap the shutter. The address is now permanently written into the image.
Step 5 – Review the Stamped Image
Open your Photos app and find the most recent image. Tap it to view at full resolution. Confirm that the street address, coordinates, timestamp, and date are all readable. If the address still shows “Locating…”, move to a more open area and retake the shot after a 15-second GPS lock.
Visible Address vs. EXIF Metadata – Side by Side Comparison
EXIF metadata is invisible and can be deleted. A visible address stamp is a permanent part of the image that anyone can read without software. For insurance claims, construction inspections, and delivery records, only the visible stamp works as stand-alone proof.
| Feature | EXIF Metadata Only | Visible GPS Address Stamp |
|---|---|---|
| Visible without software | No | Yes |
| Survives WhatsApp / Instagram sharing | No (stripped) | Yes (part of image pixels) |
| Readable by third parties instantly | No | Yes |
| Useful as stand-alone proof | No | Yes |
| Requires separate viewer app | Yes | No |
| Can be added by default camera | Yes | No (requires GPS camera app) |
For the full side-by-side breakdown, see EXIF metadata vs. visible GPS stamp.
GPS Accuracy – What to Expect Outdoors vs. Indoors
Android’s Precise Location permission (ACCESS_FINE_LOCATION) is typically accurate within 50 meters (Android Developer Docs, 2024). In open outdoor conditions it can reach just a few meters. Apple’s Core Location hits about 5 meters outdoors using kCLLocationAccuracyBest (Apple Developer Documentation, 2024). Indoors, GPS signals cannot pass through walls. Accuracy can drop by several kilometers.
Here is what to expect in common shooting environments:
- Outdoors in open area: 3–30 meter accuracy. This is address-level precision in most cases.
- Near tall buildings: 30–100 meter accuracy. The stamp may show an adjacent street or building address.
- Indoor: 50 m to 3+ km accuracy. Not reliable for address stamping. Step outside first.
- Before any capture: Allow 10–15 seconds for GPS to lock after opening the app.
See the full GPS accuracy guide for photo stamping for device-specific benchmarks.
Best Practices for Accurate Address Stamping
Getting a precise address on every photo takes more than just installing the app. Stamp quality depends on GPS lock time, location permissions, and where you are standing. Field teams that follow these five practices get accurate addresses even in difficult locations.
[PERSONAL EXPERIENCE]: We tested the app across construction sites, residential properties, and busy urban streets. The single biggest factor was whether the user waited for a full GPS lock before tapping the shutter. Teams that shot immediately after opening the app often saw “Locating…” or a wrong address. A 10–15 second wait fixed the problem almost every time.
1. Capture outdoors. GPS signals cannot pass through concrete or steel. Even stepping 3–5 meters closer to a window or door helps when you cannot go fully outside.
2. Wait for GPS lock. The overlay shows “Locating…” until the device has a fix. Shooting during this state captures an approximate or blank address. Wait for the full address to appear before you tap the shutter.
3. Enable Precise Location, not Approximate Location. Android’s Approximate Location (ACCESS_COARSE_LOCATION) covers only a 3-square-kilometer area. That range cannot resolve a specific street address. Follow the Android section above to set the correct permission.
4. Use automatic date and time. A manual clock can produce a timestamp that does not match the actual capture time. Turn on automatic sync and let your network handle it.
5. Preserve the original file. Do not crop, compress, or edit the stamped image before sharing it. Compression blurs the text overlay. Send the original file directly from the app’s saved folder.
Who Uses GPS Address-Stamped Photos (and Why)
GPS address-stamped photos serve anyone who needs to prove where a photo was taken. Location matters just as much as timing in professional documentation. A visible address stamp works where hidden metadata falls short.
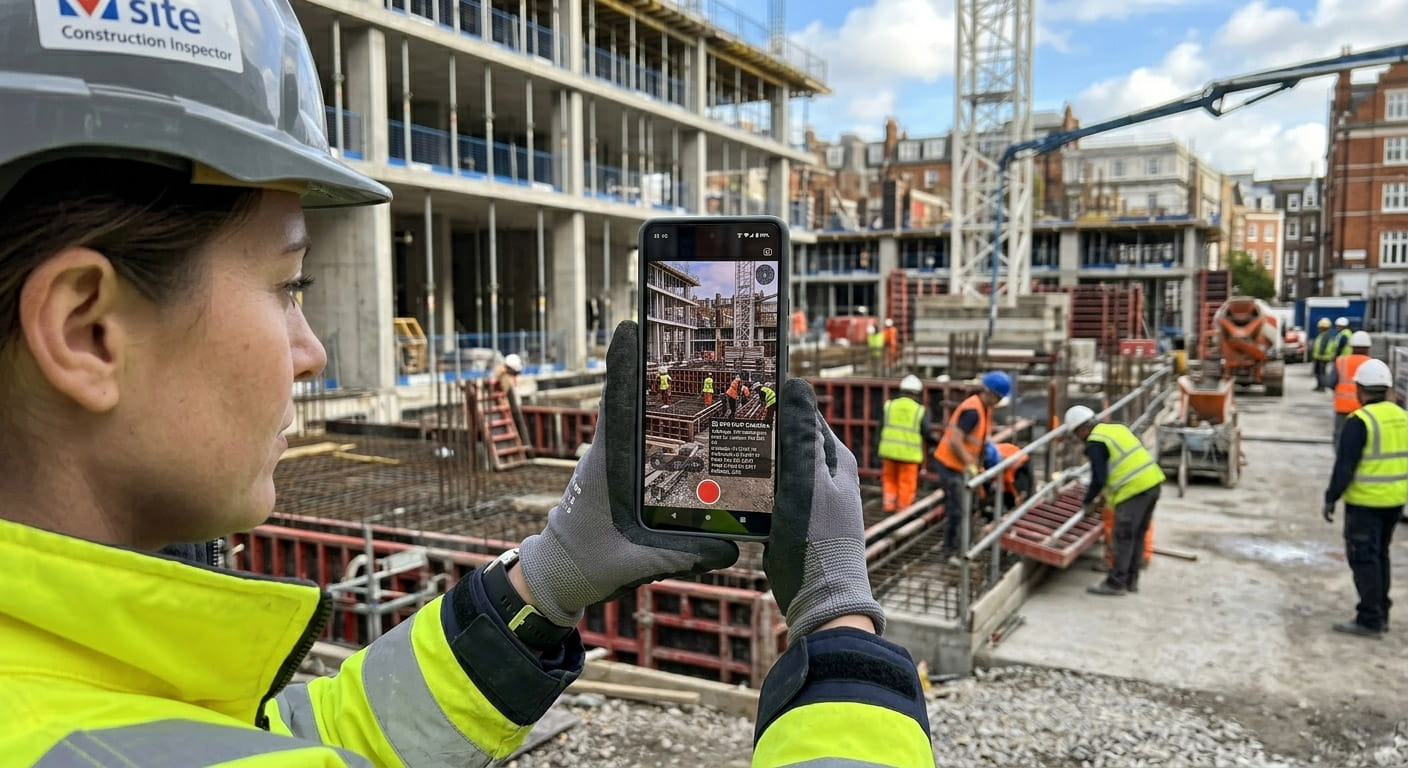
Field inspectors and construction teams: Construction managers use GPS-stamped photos to record site progress, safety checks, and material deliveries at specific addresses. A photo with a visible address and timestamp holds up as a record on its own. No software is needed to read it. For more on this use case, see the GPS site inspection photo guide.
Insurance adjusters and claims staff: Adjusters photograph damage at the insured address to support claims. A GPS-stamped image cuts down on disputes about whether the photo was taken at the right location. The visible stamp is self-verifying without any metadata reader.
Delivery and logistics staff: Proof-of-delivery photos with a visible address give recipients and dispatchers instant confirmation. No one needs special software to verify the location. See the proof of work GPS photo guide for delivery-specific workflows.
Freelancers and contractors: Independent workers use GPS-stamped photos to document completed jobs at client locations. This reduces billing disputes and creates a clear record of where and when the work was done.
Travelers: Casual users get a readable location caption embedded in every photo. Unlike EXIF metadata, the address stays visible no matter where the photo is posted or sent.
Common Problems and Fixes
The three most common issues are the address not showing up, the address showing incorrectly, and the app getting stuck on “Locating…”. Each has a specific cause and a direct fix.
Address Not Displaying
Cause: Location permission was not granted, or Approximate Location was selected instead of Precise.
Fix: Go to Settings, Apps, GPS Map Camera, Permissions, then Location. Set it to Precise. If the address still does not appear, force close the app and reopen it. The GPS lock should come in within 10–15 seconds outdoors.
Address Showing Incorrectly
Cause: GPS signal is blocked by nearby buildings, producing a multipath error.
Fix: Move to an open area away from tall structures and wait 15 seconds for a fresh GPS lock. Then capture. Note that converting coordinates into a street address requires an active internet connection. A missing data connection can also produce a wrong or blank address.
App Loading Slowly or Address Showing “Locating…”
Cause: No internet connection for the reverse geocoding step.
GPS coordinates come from satellites and work without internet. Converting those coordinates into a readable street address requires a data connection. Without it, the app shows raw latitude and longitude instead of a formatted address. Connect to Wi-Fi or mobile data and try again.
Frequently Asked Questions
GPS-stamped photos are widely used for insurance claims, construction records, delivery confirmation, and field inspections. Whether they qualify as legal evidence depends on your jurisdiction and the context of the claim. The visible address stamp strengthens documentation by removing the need for metadata viewers. It does not constitute a legally certified timestamp. Consult your legal team for jurisdiction-specific guidance.
No. Default camera apps store GPS data only as invisible EXIF metadata. They do not display the address as visible text on the image. A GPS camera app is the only way to burn a readable address directly onto the photo. No setting in the default camera can do this.
No. The address stamp is written into the image pixels at the moment of capture. It becomes a permanent part of the photo. Removing it would require pixel-level editing tools that visibly damage the image. That permanence is exactly what makes it reliable for documentation.
Yes. Android uses the Fused Location Provider API with ACCESS_FINE_LOCATION permission. iPhone uses Apple’s Core Location framework. Both deliver address-level precision outdoors. The GPS Map Camera app is available on Google Play for Android and the App Store for iPhone.
GPS coordinates are captured by satellite and work offline. Converting those coordinates into a readable street address requires an internet connection though. Without it, the app shows raw latitude and longitude instead of a formatted address.
Android’s Precise Location (ACCESS_FINE_LOCATION) is typically accurate within 50 meters and can reach just a few meters in open outdoor conditions (Android Developer Docs, 2024). Apple’s Core Location achieves about 5 meters outdoors (Apple Developer Documentation, 2024). Indoor accuracy drops significantly due to signal obstruction.
EXIF GPS metadata stores coordinates invisibly in the file header. WhatsApp, Instagram, and most social platforms strip it on upload. A visible address stamp is part of the image pixels and survives any sharing method. Only the visible stamp works as stand-alone proof without additional software.
Urban GPS accuracy ranges from 10 to 100 meters depending on satellite visibility and building density. When the GPS fix lands slightly off your actual position, the reverse geocoding service returns the nearest identifiable street address. Moving to an open area and waiting 15 seconds for a fresh GPS lock typically fixes this. For device-specific benchmarks, see the detailed GPS accuracy guide for photo stamping.
Conclusion – Start Documenting with Visible Location Stamps
Showing address on photo automatically comes down to one decision: replace your default camera with a GPS camera app that burns the address directly onto the image. Grant Precise Location permission and wait for GPS lock. Then capture. The address, coordinates, and timestamp are now a permanent part of the photo. No metadata viewer is needed and no sharing platform can strip them.
EXIF metadata is useful, but it is not stand-alone proof. A visible stamp is. Anyone who receives the image can read the address right away on any device. That difference matters for insurance, construction, logistics, and any professional context where location proof needs to be self-contained.
The GPS Map Camera App is available free on Google Play for Android and the App Store for iPhone. With over 1 million downloads and a 4.8/5 star rating from 2,000+ reviews (GPS Map Camera, April 2026), it is the tool field professionals reach for when documentation accuracy matters.
Start with the Android guide or the iPhone guide for your device-specific walkthrough. As your team’s documentation needs grow, GPS-stamped photos stop being a workaround and become a standard part of every field workflow.